Corona Scripting
Corona uses the Lua scripting language. If you've ever programmed in any language, you will find Lua an easy transition. Our Introduction to Lua guide provides an overview of Lua, or you can learn Lua on YouTube. In a very short time, you will find yourself writing that great app that you've dreamed of creating!If you're completely new to programming, Lua is still easy to learn and this guide will help you along.
Text Editors
In addition to Corona, you will need a text editor. There are several editors available and choosing one is much like choosing a car — everybody has their own preferences and you should explore which one suits you best.create a simple game with corona sdk
Your first app is going to be very simple, but it will demonstrate some important concepts. We are going to make a simple tapping game to keep a balloon in the air. Each time the balloon is tapped, we will "push" it a little higher.Notes
- The best way to use this guide is to follow every step — type in the code, add the images, and see your project gradually come to life. It may take a little more time, but you will gain a much better understanding.
- Included with each chapter is a downloadable file which contains all of the images, audio files, and other assets related to that chapter.
Starting a Project
Creating a new project in Corona is easy. In just a few simple steps you'll be ready to make your first app!- Open the Corona Simulator.
- Click New Project from the welcome window or select New Project... from the File menu.
- For the project/application name, type
BalloonTapand ensure that the Blank template option is selected. Leave the other settings at default and click OK (Windows) or Next (Mac). This will create the basic files for your first game in the location (folder) that you specified. This is also the folder in which you'll place all of your app files/assets, including images, program files, etc.
Including Images
You will need images for this app, placed within the project folder created above. There are just three involved with this project:| File | Size (w×h) | Usage |
|---|---|---|
background.png | 360 × 570 | The background — purely decorative so that we're not staring at a black background. |
platform.png | 300 × 50 | The platform/floor — keeps the balloon from falling off the bottom of the screen. |
balloon.png | 112 × 112 | The balloon. |
!
For this project, you can either create your own images or download our images. If you make your own, note these image guidelines:
- Corona supports PNG and JPG format.
- Images should not contain an embedded ICC profile.
- Avoid progressive JPG files since they will take much longer to load.
Loading the Background
The first image that we need to load is the background. Corona places everything on the screen from back to front in regards to layering, so the first image we load will exist behind other images that are loaded afterward. While there are ways to change the layering order of images and send them to the back or front of the display stack, we'll keep this project simple and load them in a logical order.Using your chosen text editor, locate and open the
main.lua file within your project folder. The main.lua file is the foundational In this
main.lua file, type in the command:local background = display.newImageRect( "background.png", 360, 570 )- The first word,
local, is a Lua command indicating that the next word will be a variable. A variable, just like you learned in math class, is used to store a value. In this case, that value will be an image used as your background.
Note thatlocalis always lowercase and it's used here to declare a variable; for example, the first time you use the variable, you should add the wordlocalin front of it. - The second word,
background, is the name of our variable. Any time we want to make changes to the image stored inbackground, we will use this variable name.
Remember to always use different variable names each time you use a variable. Just as it gets confusing if everyone in a classroom is named "John," using the same variable name for all of your objects creates confusion in your program. - The
=(equal sign) is used to assign the variablebackgroundto an image. display.newImageRect()is one of the Corona APIs (Application Programming Interface). It is used to load an image from a file so that you can use it in the app. There are a couple of ways to load an image into your app, butdisplay.newImageRect()is special in that it can resize/scale the image (this will be explained in just a moment).- Inside the parentheses are the parameters which we pass to
display.newImageRect(), sometimes referred to as arguments. The first parameter is the name of the image file that we want to load, including the file extension (.png).
Important
The specified name must match the actual file name exactly, including case-sensitive matching! For instance, if the actual file name is background.png, do not enter it as "BackGround.PNG".360 and 570 specify the size that we want the background image to be. In this case, we'll simply use the image's pixel dimensions, although as noted above, display.newImageRect() allows you to resize/scale the image via these numbers.background.x = display.contentCenterX
background.y = display.contentCenterY0,0 which is located in the x and y properties, however, we can move the background image to a new location.For this project, we'll place the background in the center of the screen — but what if we don't know exactly which coordinate values represent the center? Fortunately, Corona provides some convenient shortcuts for this. When you specify the values
display.contentCenterX and display.contentCenterY, Corona will set the center coordinates of the screen as the background.x and background.y properties.
Action!
Let's check the result of your code. Save your modified main.lua file and then, from within the Corona Simulator, "relaunch" it using If you get an error or can't see the background, there are a few possibilities as to the cause:
- One of the commands was typed incorrectly.
- The image file isn't in the same folder as
main.lua. - The specified filename and/or extension is incorrect or mismatched in case.
Loading the Platform
Time to load the platform. This is very similar to loading the background. Following the three lines of code you've already typed, enter these commands:local platform = display.newImageRect( "platform.png", 300, 50 )
platform.x = display.contentCenterX
platform.y = display.contentHeight-25display.contentHeight, we know the height of the content area. But remember that platform.y places the center of the object at the specified location. So, because the height of this object is 50 pixels, we subtract 25 pixels from the value, ensuring that the entire platform can be seen on screen.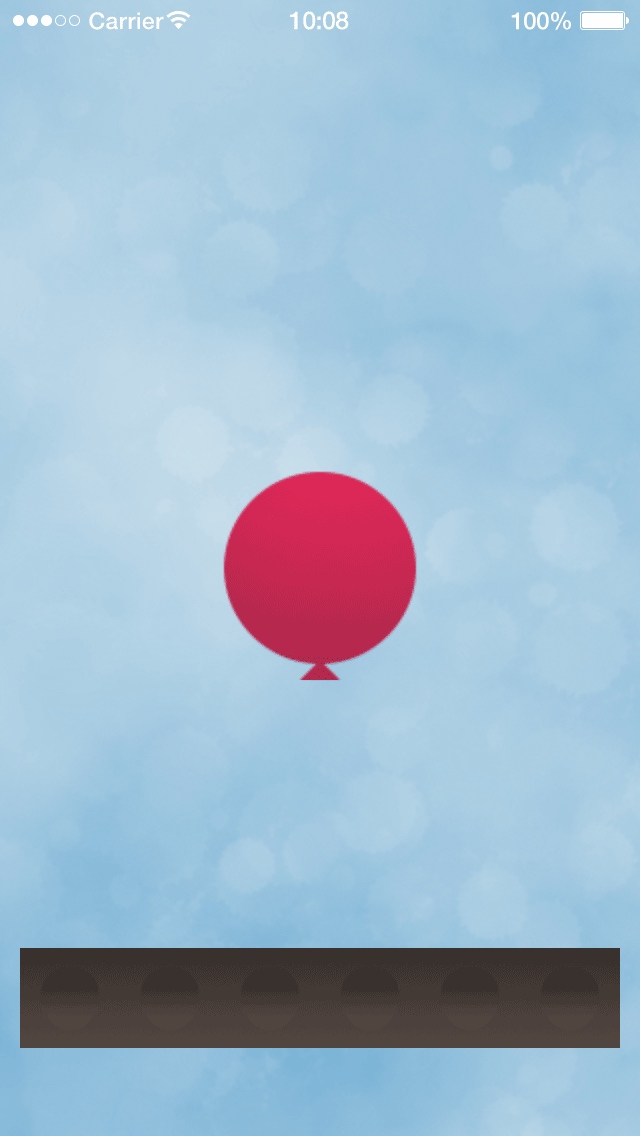
main.lua file and relaunch the Simulator to see the platform graphic.Loading the Balloon
To load the balloon, we'll follow the same process. Below the previous commands, type these lines:local balloon = display.newImageRect( "balloon.png", 112, 112 )
balloon.x = display.contentCenterX
balloon.y = display.contentCenterYalpha property to 80% (0.8):balloon.alpha = 0.8main.lua file and relaunch the Simulator. There should now be a balloon in the center of the screen.Adding Physics
Time to get into physics! Corona includes the Box2D physics engine for your use in building apps. While using physics is not required to make a game, it makes it much easier to handle many game situations.Including physics is very easy with Corona. Below the previous lines add:
local physics = require( "physics" )
physics.start()- The command
local physics = require( "physics" )physicsfor later reference. This gives you the ability to call other commands within the physics library using thephysicsnamespace variable, as you'll see in a moment. physics.start()does exactly what you might guess — it starts the physics engine.
physics.addBody:physics.addBody( platform, "static" )platform. In addition, the second parameter tells Corona to treat it as a static physical object. What does this mean? Basically, static physical objects are not affected by gravity or other physical forces, so anytime you have an object which shouldn't move, set its type to "static".Now add a physical body to the balloon:
physics.addBody( balloon, "dynamic", { radius=50, bounce=0.3 } )"dynamic") is actually optional because this is the default body type, but we'll include it here to help with the learning process.The final part of this
physics.addBody command is used to adjust the balloon's body properties — in this case we'll give it a round shape and adjust its bounce/restitution value. Parameters must be placed in curly brackets ({}) (referred to as a table in the Lua programming language).- Because the balloon is a round object, we assign it a
radiusproperty with a value of50. This value basically matches the size of our balloon image, but you may need to adjust it slightly if you created your own balloon image. - The
bouncevalue can be anynon-negative decimal or integer value. A value of0means that the balloon has no bounce, while a value of1will make it bounce back with 100% of its collision energy. A value of0.3, as seen above, will make it bounce back with 30% of its energy.
Notes
- A
bouncevalue greater than1will make an object bounce back with more than 100% of its collision energy. Be careful if you set values above1since the object may quickly gain momentum beyond what is typical or expected. - Even if you change the balloon's
bounceproperty to0, it will still bounce off theplatformobject because, by default, objects have a bounce value of0.2. To completely remove bouncing in this game, set both the balloon and the platform tobounce=0.
main.lua file and relaunch the Simulator. As a fun experiment, you can try adjusting the bounce value and relaunch the project to see the effect.Functions
At this point, we have a balloon that drops onto a platform and bounces slightly. That's not very fun, so let's make this into a game! For our balloon tap game to work, we need to be able to push the balloon up a little each time it's tapped.To perform this kind of feature, programming languages use what are called functions. Functions are short (usually) sections of code that only run when we tell them to, like when the player taps the balloon.
Let's create our first function:
local function pushBalloon()
end- As before, we use the keyword
localto declare the function. - The keyword
functiontells Corona that this is a function and that its set of commands will be called by the namepushBalloon. - The ending parentheses (
()) are required. In later chapters we will put something in the parentheses, but for now you can leave this as shown. - As mentioned above, functions are
self-contained sections (blocks) of code which run only when we tell them to. Thus, whenever you create a function, you must close it with the keywordend. This tells Lua that the function is finished.
end keyword:balloon:applyLinearImpulse( 0, -0.75, balloon.x, balloon.y )balloon:applyLinearImpulse is a really cool command. When applied to a dynamic physical object like the balloon, it applies a "push" to the object in any direction. The parameters that we pass tell the physics engine how much force to apply (both horizontally and vertically) and also where on the object's body to apply the force.The first two parameters,
0 and -0.75, indicate the amount of directional force. The first number is the horizontal, or x direction, and the second number is the vertical, or y direction. Since we only want to push the balloon upwards 0 as the first parameter. For the second parameter, with a value of -0.75, we tell the physics engine to push the balloon up a little bit. The value of this number determines the amount of force that is applied: the bigger the number, the higher the force.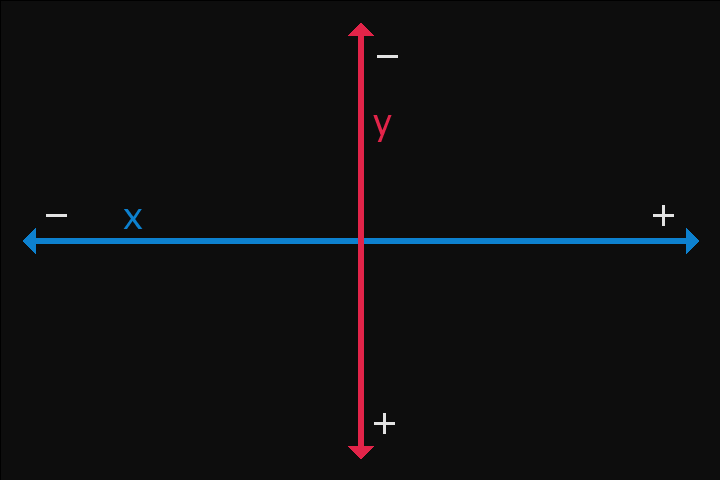
Note
As shown in the diagram at right, positive x values in Corona extend to the right, while positive y values extend downward (not upward as in the Cartesian coordinate system). This is why we use a negative value (-0.75) to push the balloon upward.balloon.x and balloon.y, tell the physics engine where to apply the force, relative to the balloon itself. If you apply the force at a location which is not the center of the balloon, it may cause the balloon to move in an unexpected direction or spin around. For this game, we will keep the force focused on the center of the balloon.In total, the
pushBalloon function should look like this:local function pushBalloon()
balloon:applyLinearImpulse( 0, -0.75, balloon.x, balloon.y )
end!
It's considered good programming practice to indent at least one tab or 3-4 spaces when you add lines of code inside functions. This makes your code more readable and it's easier to recognize functions in longer programs.
Events
Events are what create interactivity and, in many ways, Corona is anAdding an event listener is easy. Consider this example:
balloon:addEventListener( "tap", pushBalloon )- First, we must tell Corona which object is involved in the event listener. For this game, we want to detect an event related directly to the
balloonobject. - Immediately following this, add a colon (
:), thenaddEventListener. In Lua, this is called an object method. Essentially,addEventListener, following the colon, tells Corona that we want to add an event listener toballoon, specified before the colon. - Inside the parentheses are two parameters which complete the command. The first parameter is the event type which Corona will listen for, in this case
"tap". The second parameter is the function which should be run (called) when the event occurs, in this case thepushBalloonfunction which we wrote in the previous section. Essentially, we're telling Corona to run thepushBalloonfunction every time the user taps the balloon.
Action!
That is everything — you have a functional game now! If you save your main.lua file and relaunch the Simulator, it should be ready to go. Try your best to continue tapping/clicking the balloon and prevent it from touching the platform!local background = display.newImageRect( "background.png", 360, 570 )
background.x = display.contentCenterX
background.y = display.contentCenterY
local platform = display.newImageRect( "platform.png", 300, 50 )
platform.x = display.contentCenterX
platform.y = display.contentHeight-25
local balloon = display.newImageRect( "balloon.png", 112, 112 )
balloon.x = display.contentCenterX
balloon.y = display.contentCenterY
balloon.alpha = 0.8
local physics = require( "physics" )
physics.start()
physics.addBody( platform, "static" )
physics.addBody( balloon, "dynamic", { radius=50, bounce=0.3 } )
local function pushBalloon()
    balloon:applyLinearImpulse( 0, -0.75, balloon.x, balloon.y )
end
balloon:addEventListener( "tap", pushBalloon )Extra Credit
Congratulations, you have created a basic game in just 25 lines of code! But there is something missing, isn't there? Wouldn't it be nice if the game kept track of how many times the balloon was tapped? Fortunately that's easy to add!First, let's create an object to display the number of taps on the balloon. Remember the rules of layering discussed earlier in this chapter? New objects will be placed in front of other objects which were loaded previously, so this object should be loaded after you load the background — otherwise it will be placed behind the background and you won't see it.
Immediately after the three lines which load and position the background, add these two lines:
local tapCount = 0
local tapText = display.newText( tapCount, display.contentCenterX, 20, native.systemFont, 40 )local tapCount = 0— Similar to above, this line creates a local Lua variable. In this case, however, we'll use it to store an integer instead of associating it with an image. Since the player should begin the game with no score, we'll initially set its value to0, but this can change later.- The second line begins with
local tapTexttapText. display.newText()is another Corona API, but instead of loading an image as we did earlier, this command creates a text object. Because we are assigning the variabletapTextto this object, we'll be able to make changes to the text during our game, such as changing the printed number to match how many times the balloon was tapped.- Inside the parentheses are the parameters which we pass to
display.newText(). The first parameter is the initial printed value for the text, but notice that instead of setting a direct string value like"0", we actually assign the variable which we declared on the previous line (tapCount). In Corona, it's perfectly valid to specify a variable as a parameter of an API, as long as it's a valid variable and the API accepts the variable's type as that parameter.
The second two parameters,
The fourth parameter for this API is the font in which to render the text. Corona supports custom fonts across all platforms, but for this game we'll use the default system font by specifying
The final parameter is the size of the rendered text.
display.contentCenterX and 20, are used to position this text object on the screen. You'll notice that we use the same shortcut of display.contentCenterX to position the object in the horizontal center of the screen, and 20 to set its vertical y position near the top of the screen.The fourth parameter for this API is the font in which to render the text. Corona supports custom fonts across all platforms, but for this game we'll use the default system font by specifying
native.systemFont.The final parameter is the size of the rendered text.
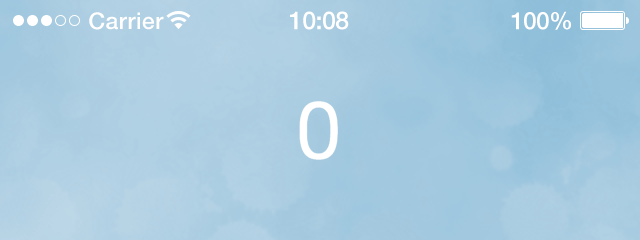
Action!
Let's check the result of this new code. Save your modified main.lua file and relaunch the Simulator. If all went well, the text object should now be showing, positioned near the top of the screen.display.newText() will be white. Fortunately, it's very simple to change this. Directly following the two lines you just added, type this command:tapText:setFillColor( 0, 0, 0 )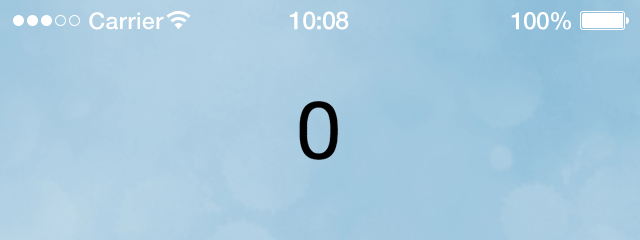
setFillColor() command modifies the fill color of the object tapText. The setFillColor() command accepts up to four numeric parameters in the range of 0 to 10.Let's move on! The new text object looks nice, but it doesn't actually do anything. To make it update when the player taps the balloon, we'll need to modify our
pushBalloon function. Inside this function, following the balloon:applyLinearImpulse() command, insert two lines as follows:local function pushBalloon()
balloon:applyLinearImpulse( 0, -0.75, balloon.x, balloon.y )
tapCount = tapCount + 1
tapText.text = tapCount
end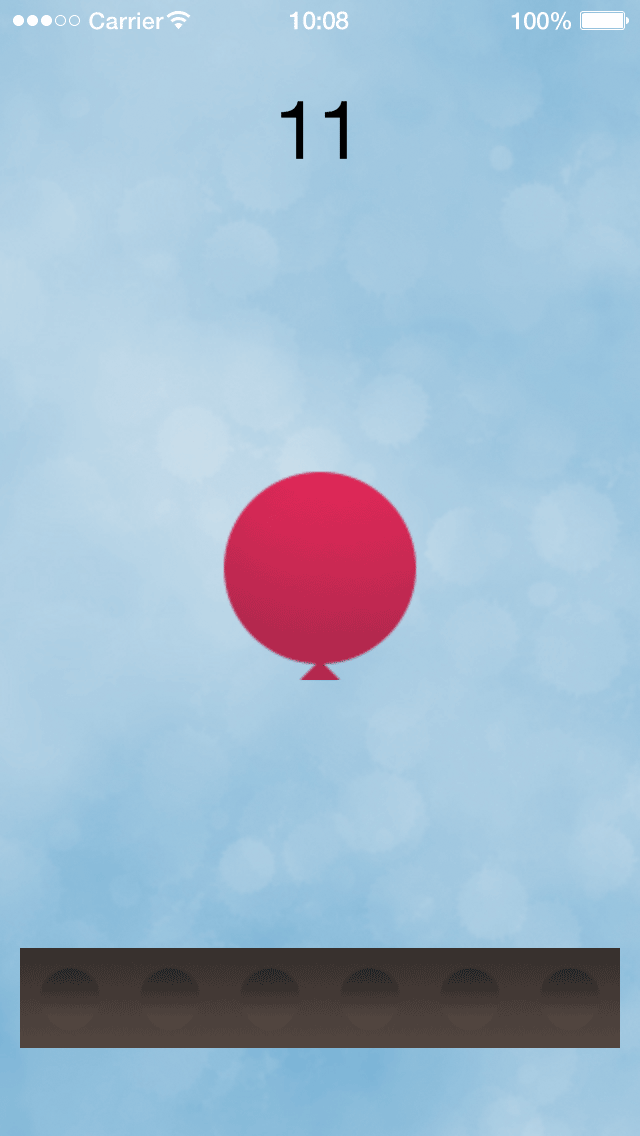
- The
tapCount = tapCount + 1tapCountvariable by 1 each time the balloon is tapped. - Our second new command,
tapText.text = tapCounttextproperty of ourtapTextobject. This allows us to quickly change text without having to create a new object each time.
Here is the complete program, just in case you missed something:
local background = display.newImageRect( "background.png", 360, 570 )
background.x = display.contentCenterX
background.y = display.contentCenterY

local platform = display.newImageRect( "platform.png", 300, 50 )
platform.x = display.contentCenterX
platform.y = display.contentHeight-25

local balloon = display.newImageRect( "balloon.png", 112, 112 )
balloon.x = display.contentCenterX
balloon.y = display.contentCenterY
balloon.alpha = 0.8

local physics = require( "physics" )
physics.start()

physics.addBody( platform, "static" )

physics.addBody( balloon, "dynamic", { radius=50, bounce=0.3 } )

local function pushBalloon()
    balloon:applyLinearImpulse( 0, -0.75, balloon.x, balloon.y )
end

balloon:addEventListener( "tap", pushBalloon )!
Look carefully — to update the on-screen text, we update a property of the text object, not the object itself. In this case, we modify the followed by , then its new value. Because we increase the value of the
text property of tapText by writing tapText.text, =tapCount variable on the line directly before, then update the text object with the same variable value, the visual display will always mirror the internal tapCount value.main.lua file and relaunch the Simulator, your game will be finished.Here's a quick overview of what you learned in this chapter:
| Command/Property | Description |
|---|---|
| display.newImageRect() | Loads and displays an image on the screen. |
| object.x | Sets the horizontal x position of an object. |
| object.y | Sets the vertical y position of an object. |
| display.contentCenterX | Shortcut for the center of the content area along the x axis. |
| display.contentCenterY | Shortcut for the center of the content area along the y axis. |
| object.alpha | Sets the alpha level of an object (opacity/transparency). |
| require() | Loads a given module or library, for example "physics". |
| physics.start() | Starts the physics engine. |
| physics.addBody() | Adds a physical body to an object. |
| object:applyLinearImpulse() | Applies a simulated impulse force to a physical object. |
| object:addEventListener() | Adds an event listener to an object, for example "tap". |
| display.newText() | Creates a text object on the screen |